There’s something about biting into a slice of hot, fresh pizza with a crispy yet chewy crust that’s slightly charred in spots with tasty browned bubbles. That first bite transports me right back to my favorite local pizzerias at home. I’ve since moved across the country, and though there are some great pizza joints here, I’d give anything for an authentic NYC-style slice or Chicago deep dish pie.
Frozen crusts or dough from the supermarket never quite hit the mark when I try to make pizza at home. They often turn out floppy with underdone centers, or the opposite – dried out and crackery. I want that golden, bubbly crust but refuse to settle for lackluster ones any longer.
I’m determined to figure out how to make pizza crust like the pros right in my own kitchen. So I went on a mission of experiments in structure, temperature regulation and ingredients. Follow me below as we unlock my secrets to real-deal golden home pizza crusts.
Essential Pizza Dough Ingredients and Their Roles
|
Ingredient
|
Role in Dough
|
|---|---|
|
Flour (Bread and All-Purpose)
|
Provides structure; protein content affects chewiness and crispiness.
|
|
Water
|
Hydrates flour, forms gluten, affects texture and airiness.
|
|
Yeast (Instant)
|
Ferment dough, causing it to rise and develop flavor.
|
|
Salt
|
Enhances flavor and regulates yeast activity.
|
|
Sugar
|
Feeds yeast contributes to browning.
|
|
Olive Oil (if used)
|
Adds flavor and helps in the dough's moisture retention.
|
|
Poolish Starter
|
Initiates fermentation, enhances flavor and texture.
|
The Pizza Trinity: Flour, Water, Yeast

First things first: Before diving into how to create golf course green grass-like oven floors or tweaking temperature settings by degrees Fahrenheit, it’s important to understand what makes up our dough.
Flour is one of four essential elements used in classic Neapolitan style pies (the others being flame, water and salt). The simplicity allows the flavor of quality flour to really shine through.
Let’s go over what each ingredient does:
Flour:
The protein content of flour affects the structure and chew of the crust. Most pizzerias opt for bread flour with 12-13% protein content. The extra gluten helps the dough stretch without tearing and contributes to the characteristic chew. All-purpose flour contains less protein (10-12%), resulting in a tender yet crispy texture so you can keep it on the lighter side. I prefer to blend the two.
Water:
Water hydrates the flour to form elastic gluten strands that trap gas bubbles. Those pockets of air expand during fermentation and baking to give our crust that airy hole structure we love. The hydration level (the percentage of flour’s weight in water) also affects the final texture; wetter doughs with higher hydration will bake up lighter and airier on the inside.
Yeast:
Yeast eats sugars present in the dough and releases carbon dioxide gas, which causes fermentation, allowing dough to rise. Active dry yeast is common for home bakers, but I reach for instant yeast 99% of the time because it cuts out proofing time by a lot.

Let’s see how these ingredients get along behind closed oven doors.
Knead the Dough, Tend the Ferment

I’ll be honest — properly kneading pizza dough used to intimidate me. I pictured old Italian nonnas expertly slapping and stretching rounds of dough across their knuckles with a stern look on their faces.
I knew it was more than just slapping dough around, so after making batch after batch, I’ve broken down proper kneading into just a few key steps:
- Mix – Combine all of your dry and wet ingredients together until you have a shaggy mass of dough that just comes together.
- Knead – Mix and knead the dough by hand for about 5-10 minutes. Kneading is when you press into the dough with your hand, stretch it, then fold it over itself. Rotate and repeat. This is what develops gluten strands that give structure.
- Proof – Let it rise, baby! Allowing the dough to proof gives time for fermentation by yeast. This not only develops flavor, but also relaxes the gluten so the crust bakes up nice and chewy. Commercial pizza joints use special proofers to control temperature, but I just cover mine and set it aside at room temp.
- Divide and shape – Punch the dough down to release air bubbles and divide into individual crusts. Using a rolling pin is a no-no, as it can deflate air pockets. I simply use my hands to gently stretch and shape the crusts.
- Proof again – Let those individual crusts relax and rise a second time before saucing, topping, and baking.
This entire process usually takes me a few hours from start to finish. While the various stages of fermenting, proofing, and shaping may seem tedious at first, patience is key for allowing flavors to build and structure to develop.
The result? Light, airy crust with just the right amount of satisfying chew.

Hacks for Next-Level Home Pizza Ovens
Pizza Baking Techniques and Tools
|
Technique/Tool
|
Description
|
|---|---|
|
Kneading
|
Develops gluten for structure and chewiness.
|
|
Proofing
|
Allows dough to rise and flavors to develop.
|
|
Baking Steel
|
Mimics a pizza stone with superior heat retention.
|
|
Broiling
|
Exposes the crust to intense top-down heat for browning.
|
|
Kettle Pizza Oven Hack
|
Uses a Weber kettle grill with a ceramic insert for high-temperature baking similar to a professional pizza oven.
|
So I had pizza dough down to a science, but achieving authentic char and leopard spotting in a standard home oven proved difficult. I was able to get some color in my regular oven, but it took longer and never developed the spots that scream artisanal pizza.
That led me down quite the rabbit hole of researching pizza oven hacks.Because who has space for a hulking wood-fired or brick oven in their home? After piles of google searches, forums videos ,and chatting with one too many pizza professionals…I landed on a method that I’m happy to share here with you all.
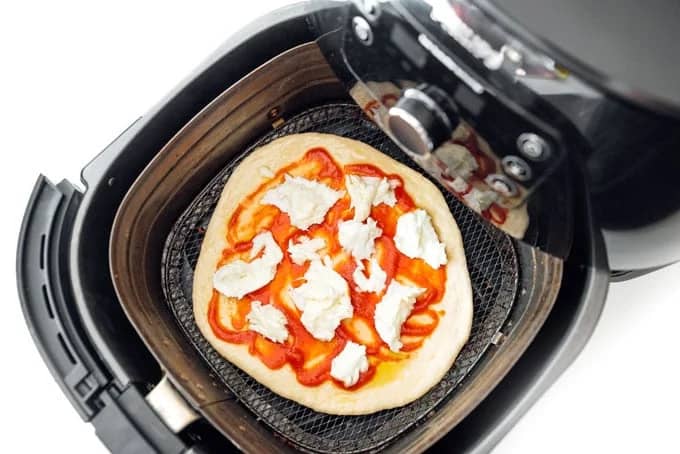
Let me introduce you to the kettle pizza oven hack. All you need is a standard Weber kettle grill and a pizza insert accessory. Here’s how it works:
- The ceramic insert mimics the cooking surface of a pizza oven, absorbing and radiating heat to crisp up crusts
- A full grill of lit charcoal beneath the insert reaches temperatures upwards of 700 degrees F
- This high ambient heat cooks crusts rapidly from underneath just like a pizza oven
- A pizza stone inside the grill absorbs excess moisture for an crispy yet chewy texture
I couldn’t wait to try it out and see how my home crusts would fare. I loaded the charcoal, let it pre-heat completely until glowing red and tossed in some wood chunks for flavor. I gently stretched and dressed my homemade dough, then carefully loaded the pizza onto the super hot ceramic surface.
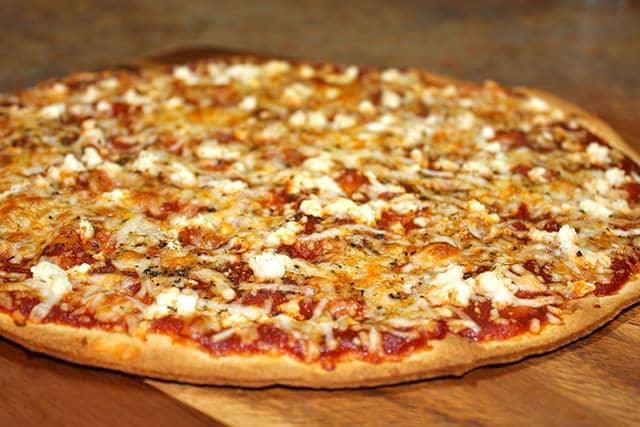
Just 2 minutes was all it took to form those coveted charred air pockets in the crust! I was thrilled that such a simple hack using my existing grill created authentic pizza oven results.
The crust came out beautifully crisp on the outside with tender chew within. Friends and family rave about the pizza night’s I’ve hosted since this discovery. I top mine simply with crushed San Marzano tomatoes, fresh mozzarella, basil and a drizzle of olive oil. ThePossibilities for white pies, barbecue chicken, and other fun personalized pizzas are endless.
Just remember – the crust is the foundation of any good pizza. So take the time to properly proof and shape yours using my tips above before experimenting with toppings.
Hacking My Oven for Pizza Perfection

While the kettle pizza oven solution worked beautifully in warmer weather, I was still struggling for evenly crisped pizza crusts once winter rolled around. My indoor oven just couldn’t compete with 700 degrees direct ambient heat. And who wants to stand outside prepping a pizza in below freezing temps?!
So I came up with a couple equipment tweaks and techniques for indoor oven pizza success:
1. Baking Steel
I invested in a quarter-inch thick baking steel to mimic a pizza stone. Rather than ceramic, it’s made of solid steel to provide superior heat conductivity and retention. I pre-heat this thing a full hour at my oven’s highest temp before baking.
1. Broiling
I specifically hunted for a rental with an oven that had broiler capability, as this exposes crusts to intense top-down radiant heat. After pre-heating my baking steel fully, I slide my pizza in directly on the steel to crisp the bottom. Then about halfway through, I switch the oven setting to high broil. Watching closely, I leave it just until the edges bubble and blacken in spots.
By hacking my home oven setup to mimic a professional one, I’m finally achieving par-baked pizza crust right from my own kitchen!
Toppings Are Key

I’ve focused mostly up till now on perfecting golden pizza crusts, but no good pie is complete without well-balanced toppings and spices. Here are some of my personal tips after lots of trial and error:
Go light on wet ingredients to prevent sogginess
I stick to drained canned tomatoes, chopping/squeezing out excess moisture from veggies, fresh mozz, etc. Things like raw pineapple and tomato slices are definite no-gos.
Layer thinly
Chop, slice or shred toppings extra thin so they cook through and don’t weigh down the delicate crust.
Season every component
It may seem like lots of herbs and spices, but they mellow beautifully. I sprinkle on oregano, garlic, red pepper flakes, Parmesan, salt and pepper.
Don’t overdo it
I find 4 or less toppings is best for balance so the crust remains the star of the show. White pies also let the crust shine.
Less is more when it comes to toppings. Allow that artisanal crust you worked so hard to claim the spotlight!
Recipes for Perfect Home Pizza
Now that you’ve got all my secrets for crafting artisanal quality pizza crusts with golden char right at home, let’s talk recipes!
Below I’m providing you with my personal go-to Pizza dough recipe, as well as some of my favorite topping ideas. I encourage you to experiment with different flours, ingredients mixes and flavors that suit your personal tastes!
Classic Home Pizza Dough
Makes enough for two 12-inch pies. Increase the batch for more pizzas.
Ingredients:
- 3 cups (375g) bread flour
- 1 cup (125g) bread flour
- 2 tablespoons (18g) suga
- 1 ½ teaspoons instant yeast
- 2 teaspoons fine sea or table salt
- ½ cup (120g) room temperature water
- 4 ounces (115g, about ½ cup) poolish starter, ripe or unripe
Instructions:
- In a large bowl, combine all-purpose flour, sugar and instant yeast. Whisk to combine.
- Whisk in water and poolish until smooth. Cover with plastic wrap and allow to ferment overnight at room temperature.
- In a large bowl, combine flours, instant yeast and salt. Mix thoroughly with hands or dough scraper.
- Create a well in the flour mixture and pour in water and olive oil if using. Using your clean hand or a wooden spoon, mix ingredients together until a shaggy ball begins to form.
- Turn out the dough onto a clean lightly floured work surface. Knead by pressing into the dough with the palm of your hand, then stretching it forward and folding over itself.
- Repeat the kneading motion for about 5 minutes until the dough becomes smooth and elastic. Form into a ball
- Place the dough into a lightly greased bowl and cover tightly with plastic wrap. Let it rise at room temp until doubled in size, about 1 hour.
- Turn the dough out onto a floured surface and divide evenly into 2 portions. Gently shape into rounds.
- Cover each crust and allow it to rest 10 minutes more to relax the dough before stretching on top of the pizza stone or steel for baking.
Bacon Caramelized Onion Spinach White Pizza
Makes enough for two 12-inch pies. Increase the batch for more pizzas.
Ingredients:
- 1 prebaked 12-inch homemade pizza crust
- Additional flour for dusting peel
- Olive oil for brushing crust
- 3 slices bacon chopped
- ½ sweet onion sliced thinly
- Fresh baby spinach 4 ounces
- Shredded mozzarella ½ cup
- Ricotta cheese ¼ cup
- Lemon zest 2 teaspoons
- Crushed red pepper flakes ¼ teaspoon
- Chopped fresh basil to garnish
Instructions:
- Pre-heat your oven to 500°F with pizza steel or stone inside.
- In a skillet over medium heat, cook bacon until starting to brown, about 4 minutes. Using a slotted spoon, transfer to a paper towel-lined plate and reserve rendered bacon fat in the pan.
- Raise heat to medium-high and add onions to hot bacon fat. Cook, stirring frequently, until deep golden brown, about 12-15 minutes.
- Brush the crust evenly with olive oil; spread onions across the crust then top with spinach, mozzarella and ricotta dollops and bacon.
- Bake on preheated steel for 7 minutes; remove from the oven and sprinkle lemon zest and red pepper flakes evenly over pizza.
- Slice and serve topped with fresh basil.
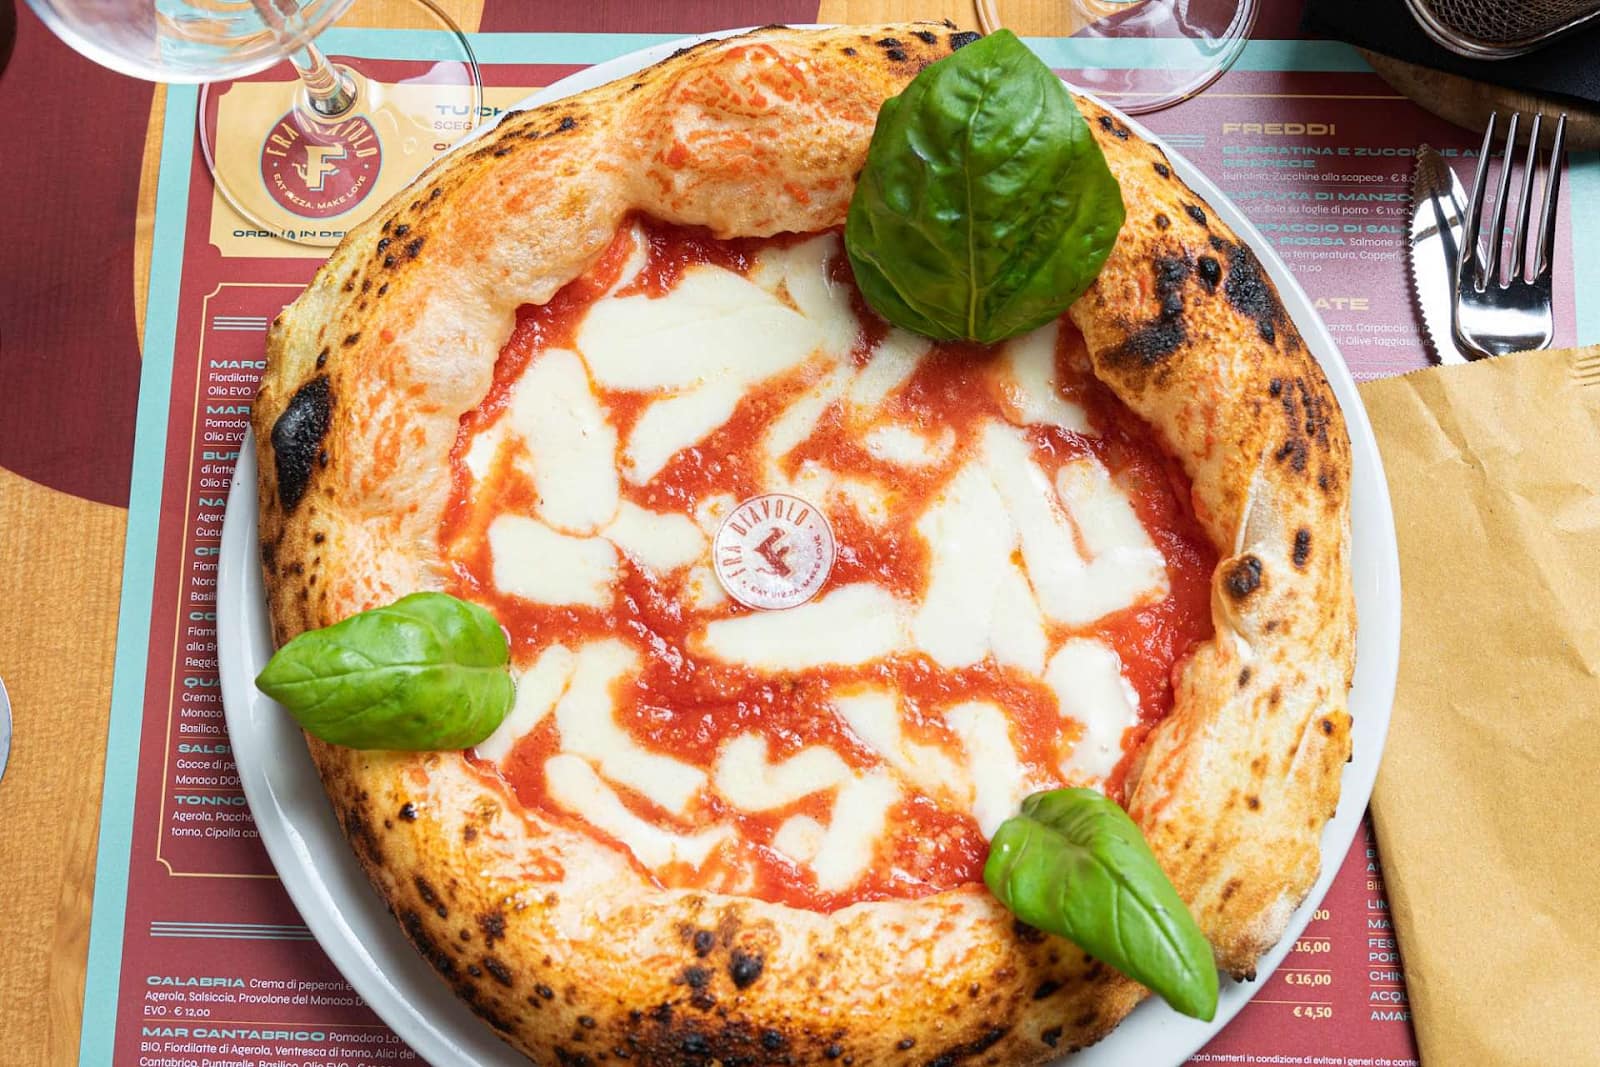
The Perfect Margherita Pizza
No crust quest is complete without the classic margherita. This one balances sweet tangy tomatoes, milky fresh mozzarella and bright herby basil. Perfection in simplicity.
For stunning presentation use both yellow and red cherry tomatoes cut in halves.
Ingredients:
- 1 ball of Homemade Pizza Dough (recipe above)
- Pizza sauce or crushed canned tomatoes (about 1/2 cup)
- Fresh mozzarella cheese thinly sliced (8 ounces)
- Halved cherry tomatoes (1 cup)
- Fresh basil leaves packed (1/4 cup)
- Olive oil (3 tablespoons)
Instructions:
Place a pizza stone or steel on the center rack of your oven; preheat to the highest setting for at least 1 hour before baking:
- When the dough has risen overnight, place a piece of parchment paper on a peel if using and sprinkle lightly with flour. I used a 16-inch aluminum peel which makes it easier to transfer pizza to preheated steel and pick up baked one.
- Turn dough out onto parchment paper (or lightly floured surface if not using a peel) and shape into a flat disc; using your fingertips, press into dough and stretch it outward from center until your desired thickness is reached.
- Spread sauce evenly across pizza, leaving about 1/2 inch around edge bare; then top with mozzarella slices, cherry tomatoes, and whole basil leaves. Drizzle olive oil over top.
- Slide pizza off of prep area (and peel if using) directly onto hot stone or steel in the oven. Bake for 8-10 minutes until cheese begins to brown on top then remove from the oven by sliding back onto a peel or large cutting board. Slice and serve immediately while still very warm.
- Very carefully, lift the dough circle onto a floured pizza peel. Spread with sauce, leaving about 1⁄2 inch border.
- Slide pizza gently off peel onto the preheated pizza stone or steel. Bake for 4 minutes until the edges begin to brown.
- Remove pizza with peel and sprinkle on mozzarella slices evenly to cover. Top with halved cherry tomatoes.
- Return pizza to oven and broil 1-2 minutes until cheese melts.
- Using peel, slide pizza off stone onto cutting board.Immediately sprinkle olive oil across pizza, followed by slivered basil leaves and a pinch of red pepper flakes.
- Slice and serve while hot!
Breaking Bread, Building Bonds

Now that you’re armed with my tried-and-true tips for achieving crispy golden awesomeness in your own kitchen, why not go the extra step like I said earlier and turn it into a chance to connect?
I’m telling you right now, hours spent rolling out dough and crafting pies from scratch is time well spent if it`s spent with loved ones!
Imagine finding someone who didn’t take sandwiches made by their grandmother growing up as an expression of love. So let’s use this opportunity to make those memories together?
These days just about every year I’ll trade off hosting expanded “family pizza nights” with various aunts, uncles and cousins. Where we catch up over wine while kneading dough then move outside in order to grill up fresh creations from each family branch on my beloved kettle pizza hack.
A lovely way for relatives spread far apart to gather if you ask me! Build new bonds between generations all while sharing heritage through the universal language of food!
The experience of preparing it together is priceless no matter what toppings we may disagree on.
Wrapping Up
So as you continue on your own crust adventures why not invite fellow dough devotees in your life along for the tasty ride?
Why not teach your kids proper shaping techniques, expand a date night by making mini crispy crusts together, or phone up old friends for a virtual pizza crafting session!
I’m grateful this hobby has made me appreciative for the basic joy of sharing humble, hearty fare straight from the oven. The pride in seeing eyes light up that very first slice makes all the flour-dusted counter tops worthwhile.